![[Cheat Sheet] Creating Components with Adalo](https://api-prod.usenotioncms.com/v1/proxy-2/block/1bfd0bd0-a213-455a-aa91-8b2b69b8ffac%2Faf6c6c2c-37e7-4d1d-b559-e422bc5921e1%2FBlue_Green_Simple_Music_Festival_Facebook_Event_Cover_Photo_(2).png?id=1bfd0bd0-a213-455a-aa91-8b2b69b8ffac)
[Cheat Sheet] Creating Components with Adalo
About this resource
Hello 👋🏿 Thanks for checking out this resource on building Adalo components. I put together these series of notes as I was working on an Adalo component so it could save me some effort should i build another one in the future.
This is a living resource so if you have any questions or comments or things you’d like to add feel free to send me a dm on twitter.
🗺 Navigation
About this resource📱 Why learn Adalo Components?🤔 What are components?🏁 Getting Started👷🏿♀️ Building ComponentsHow Components are structuredMore on that SRC folderAdding ElementsAdding Actions🚏Routing Data from your component to Adalo👯♂️ Friendly Reminders, tips and tricksComponent UXAdalo’s Standards for publishing componentsDesign — material designAccessing the style prop🧠 Commands to remember🔗 Other Adalo Component Resources
📱 Why learn Adalo Components?
Adalo is a no-code app tool for building mobile apps. They’ve raised over $8 million to date and recently revamped their component marketplace where you can sell components or offer free ones to extend functionality for Adalo’s growing user base.
🤔 What are components?
Adalo focuses heavily on react and react native. Components is a React concept. You can create components within Adalo and share them with the Adalo community.
Developers publish Libraries to the marketplace, which consist of Components
A library is a collection of components that a developer can package together.
A component is an individual functional unit within Adalo. Text, buttons, and images are all different components.
🏁 Getting Started
To create a component you’ll want to run
npx create-adalo-component my-component, where my-component is the name of the component you want to use. 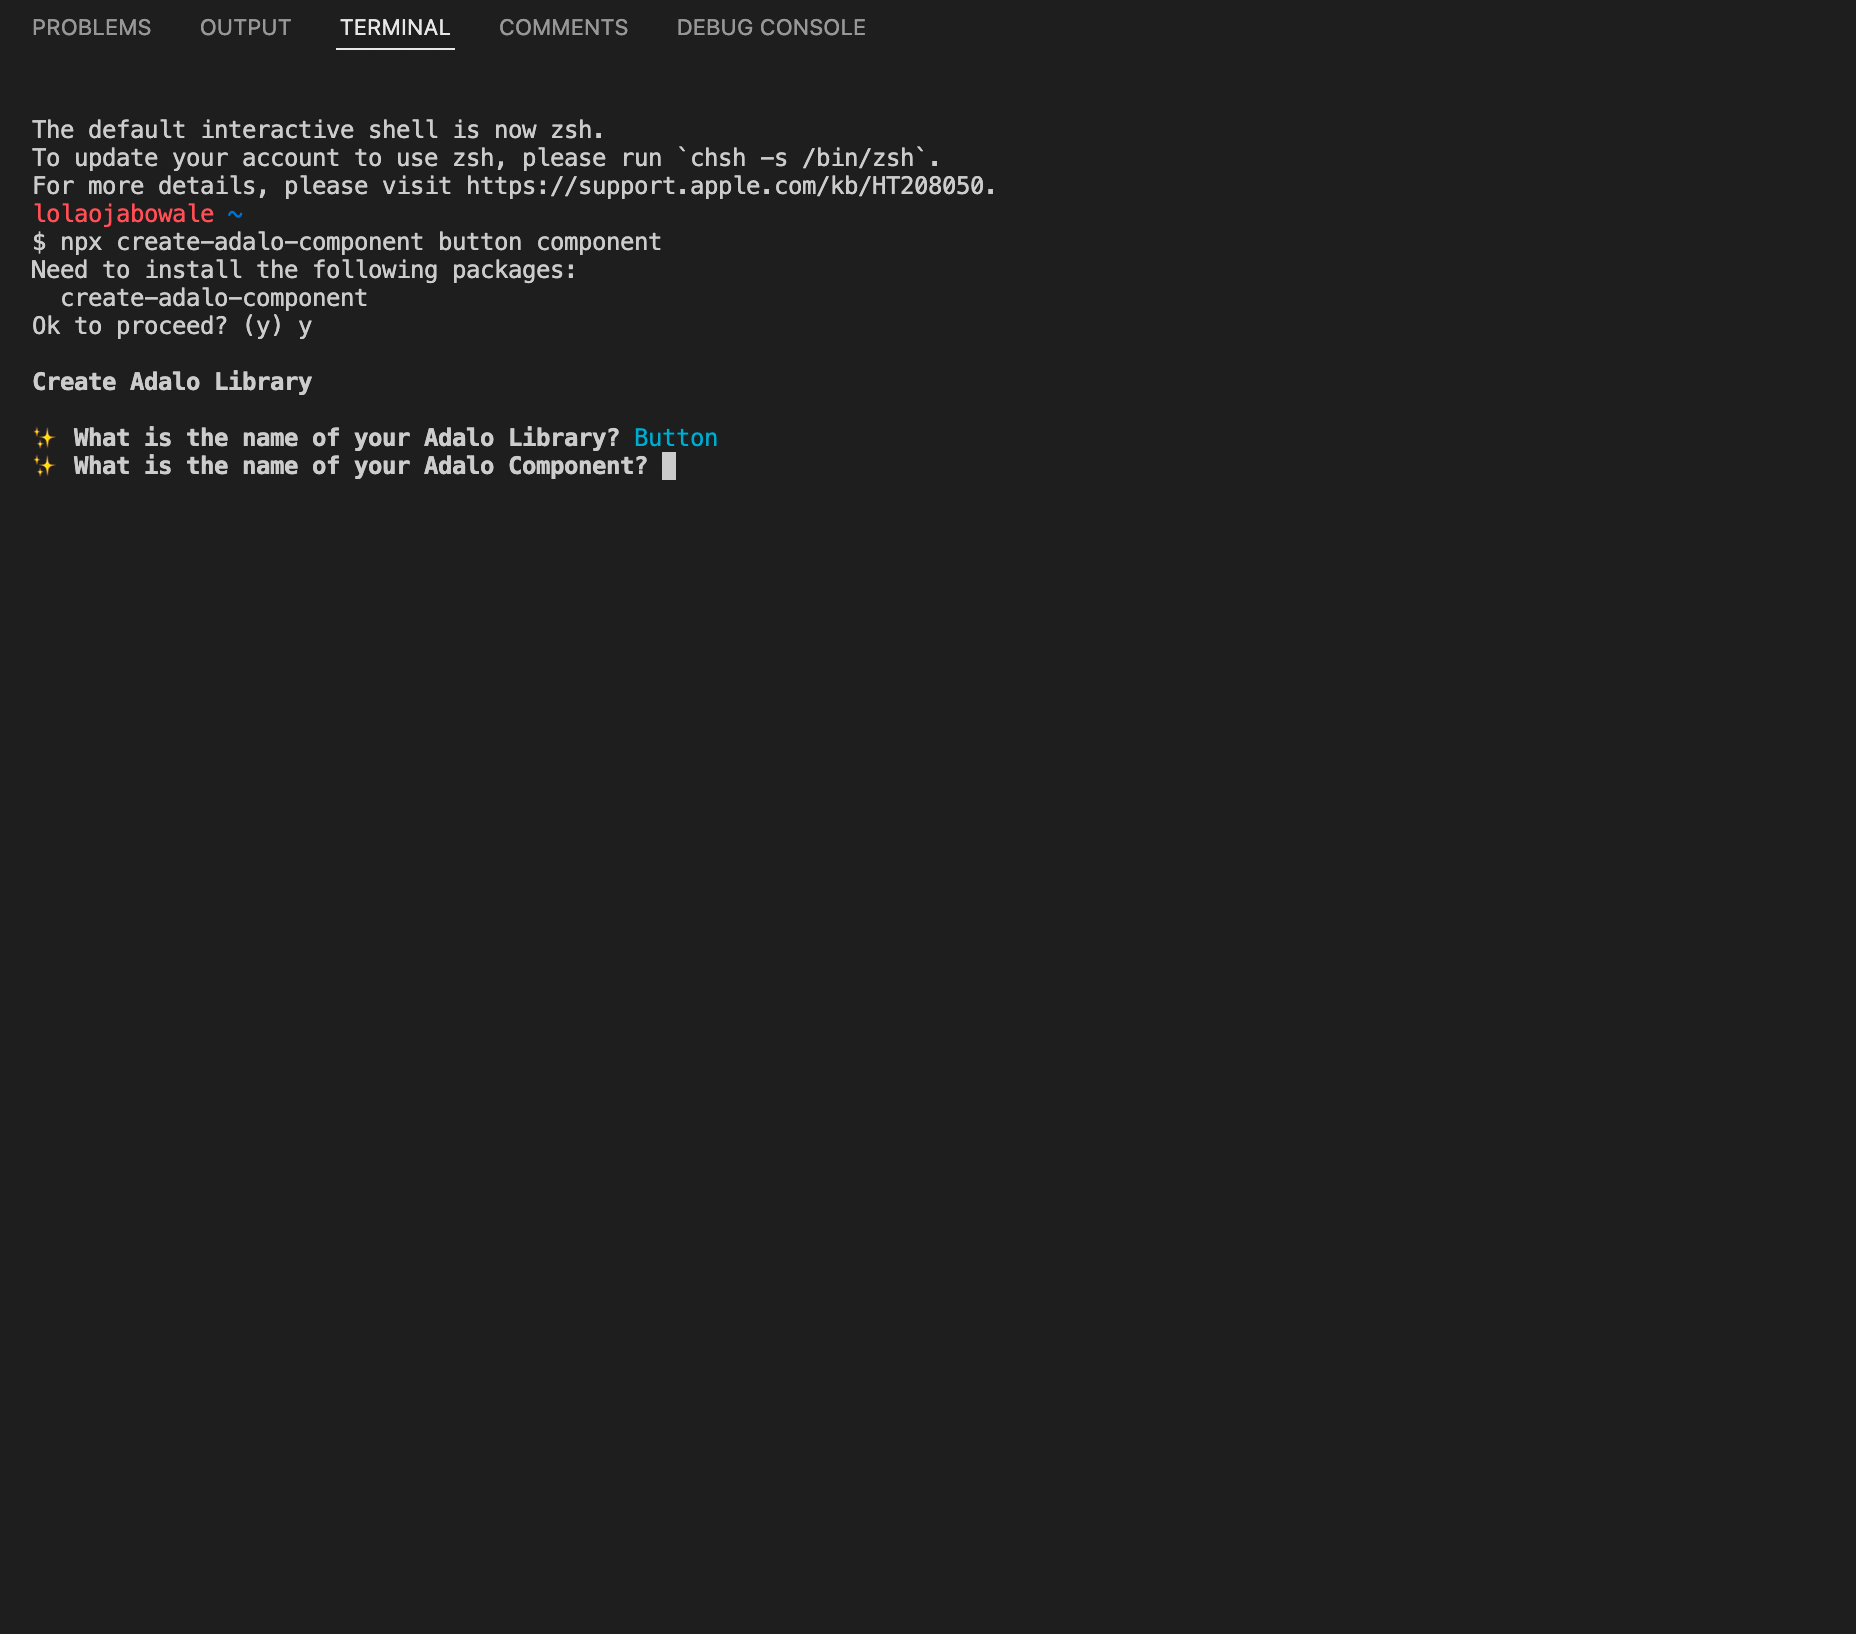
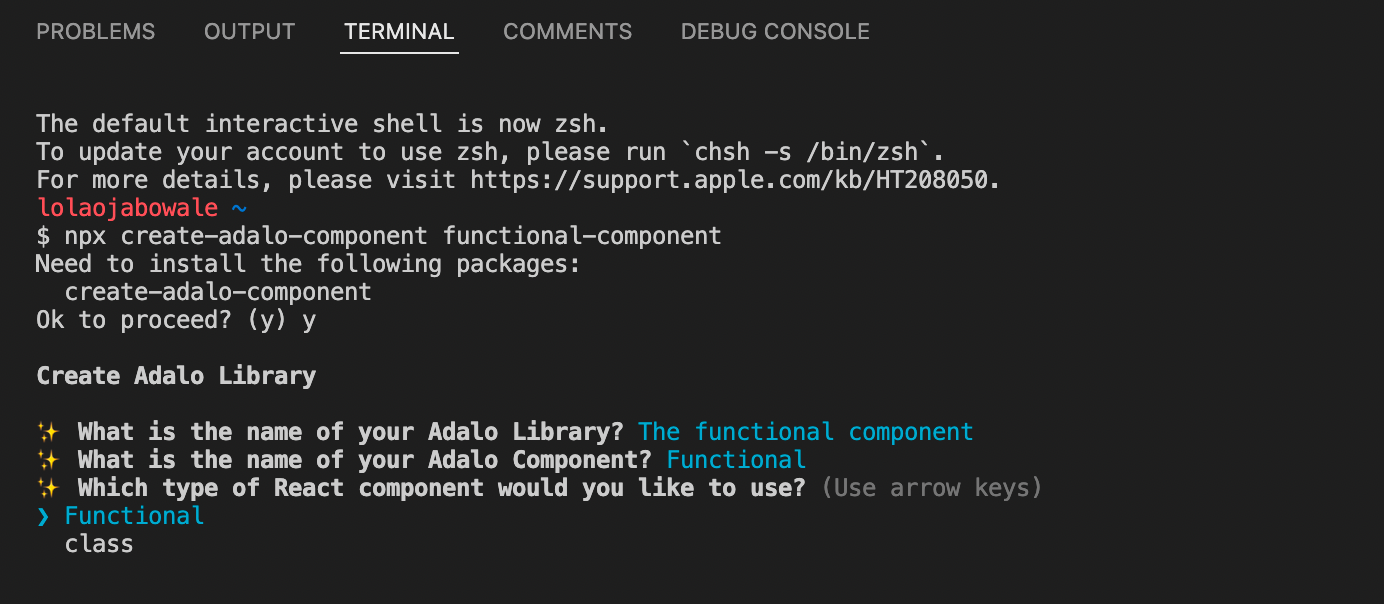
Then you’ll be prompted to choose between a functional and class component.
The main difference between both is style. More on that below 👇🏿👇🏿👇🏿
Functional vs. Class components
At the heart functional vs. class is all to do with the style of your javascript. Class components are JavaScript ES2015 classes that extend a base class from React called
Components.import React, { Component } from 'react'
import { Text, View, StyleSheet } from 'react-native'
class CoolSwitch extends Component {
render() {
const { color, text } = this.props
return (
<View style={styles.wrapper}>
<Text style={{ color }}>{text}</Text>
</View>
)
}
}
const styles = StyleSheet.create({
wrapper: {
display: 'flex',
alignItems: 'center',
justifyContent: 'center',
}
})
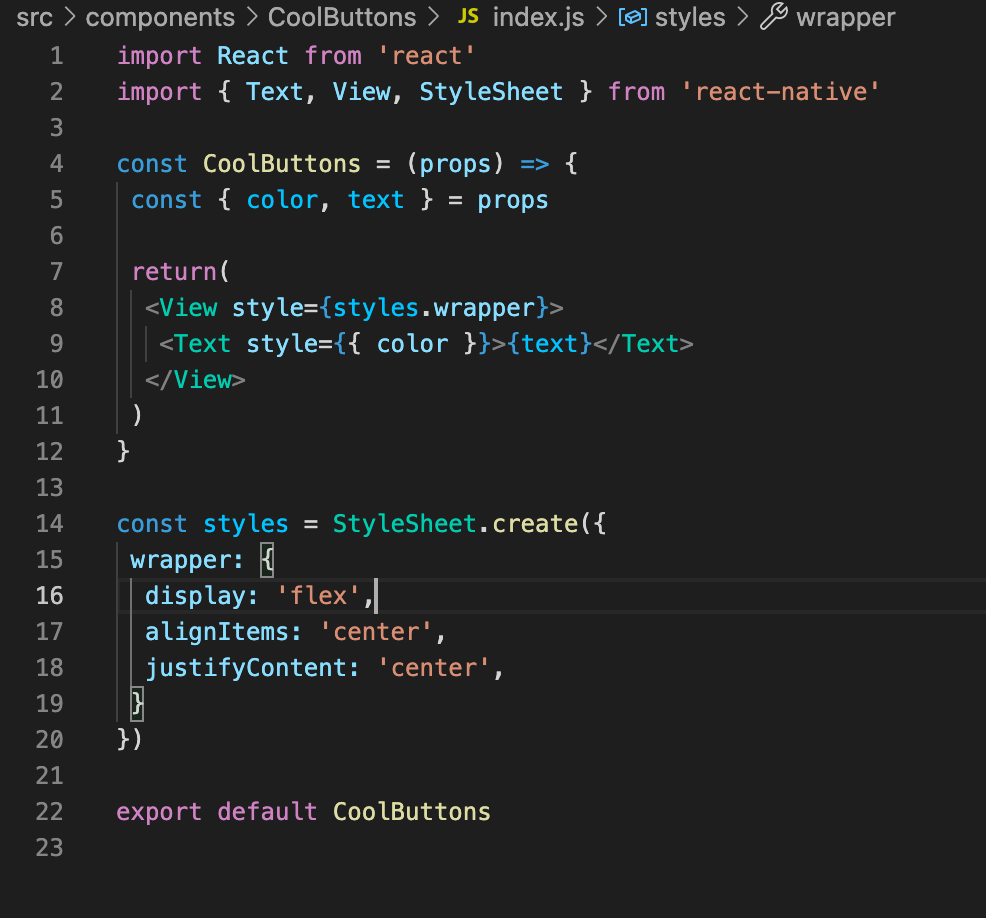
export default CoolSwitchFunctional components are more straightforward. They don’t manage their own state or have access to the lifecycle methods provided by React Native. They are sometimes called stateless components.
import React from 'react'
import { Text, View, StyleSheet } from 'react-native'

const CoolButtons = (props) => {
	const { color, text } = props

	return(
		<View style={styles.wrapper}>
			<Text style={{ color }}>{text}</Text>
		</View>
	)
}

const styles = StyleSheet.create({
	wrapper: {
		display: 'flex',
		alignItems: 'center',
		justifyContent: 'center',
	}
})

export default CoolButtons
🚨🚨🚨 If you’re looking for some precedence, Adalo’s github has tons of components. It can help to review these to learn how you can set things up. However, they’re mostly class components so if you’re not familiar with javascript it might be easier to start with those.
👩🏿🏫 Additional resources for learning about components
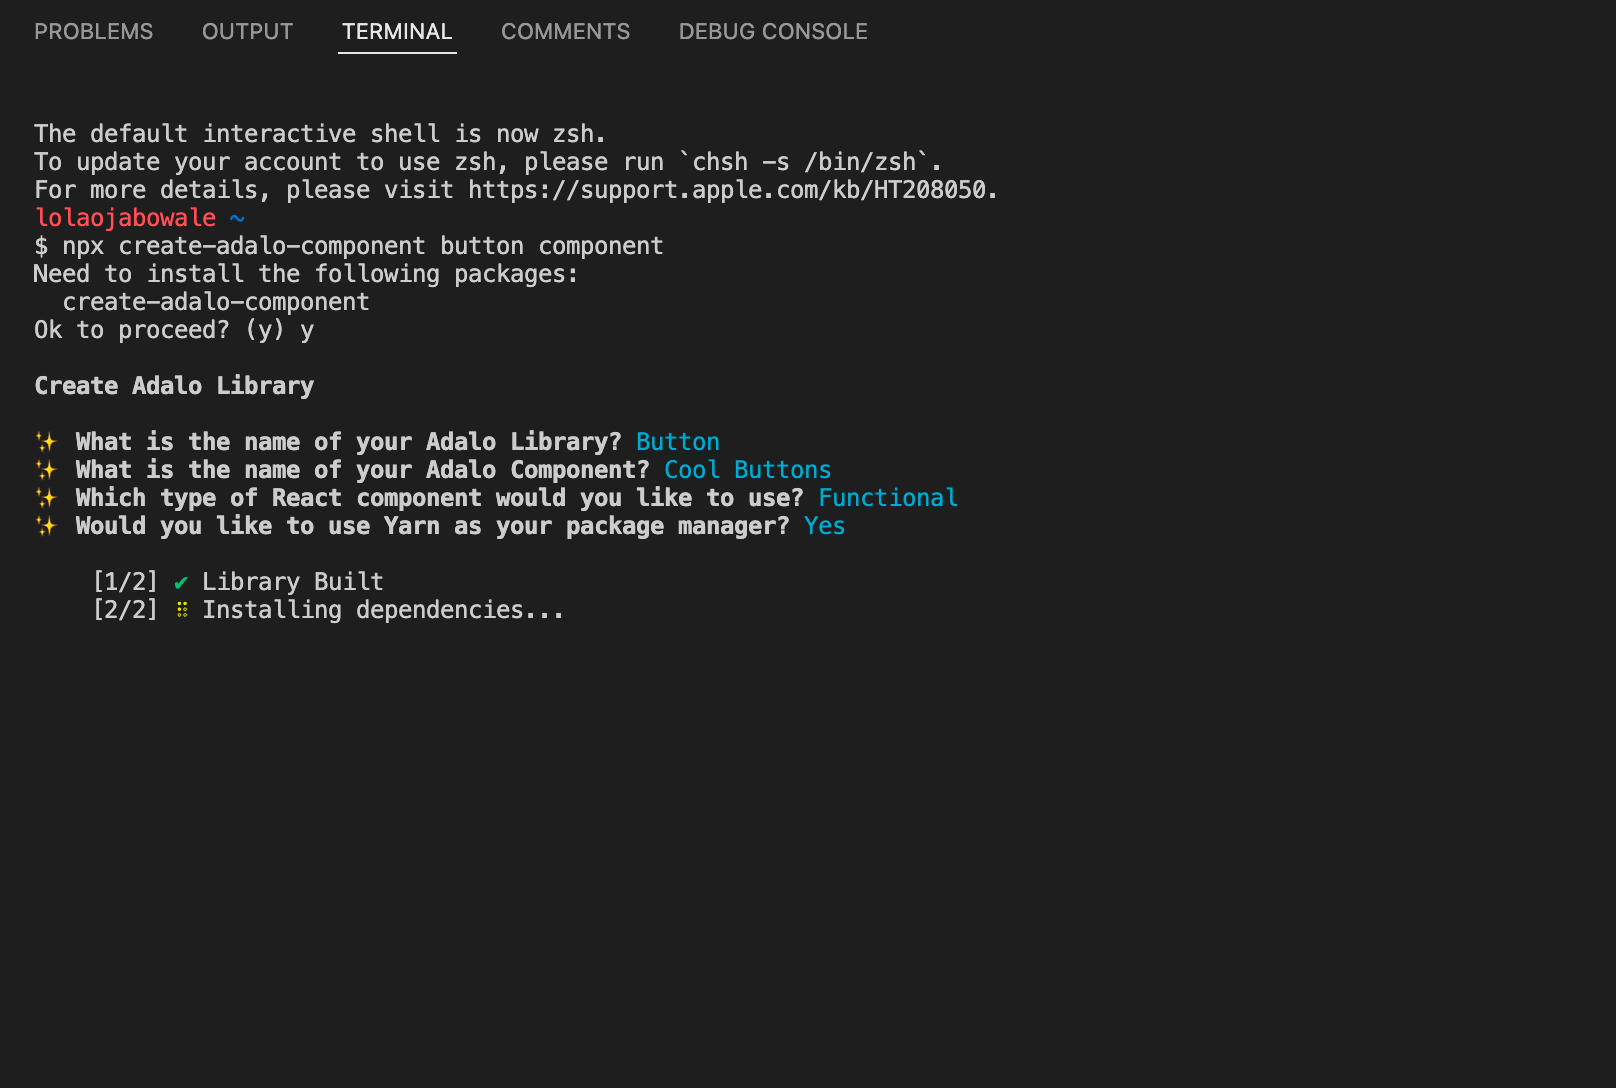
Once you run npx create-adalo-component you’ll get the question of whether you’d like to use the package manager. This mostly affects what commands you’ll use to start, run and publish your component.
If you use the package manager, your commands will start with yarn (yarn adalo start, to start the component, yarn adalo login) otherwise they will start with npx (npx adalo start, npx adalo login etc). More on commands and what they do 🔗here.
👷🏿♀️ Building Components
The component has two parts, the manifest which will be the properties and the index.js which will gets rendered in the editor and the preview
How Components are structured
Now that we’re in the component, a little bit about the folder structure. You have node_modules which you likely won’t touch directly, thumbnails which you’ll replace if you want to change the component’s look in the marketplace and in the editor, package.json with some info about your componenet and the src folder.
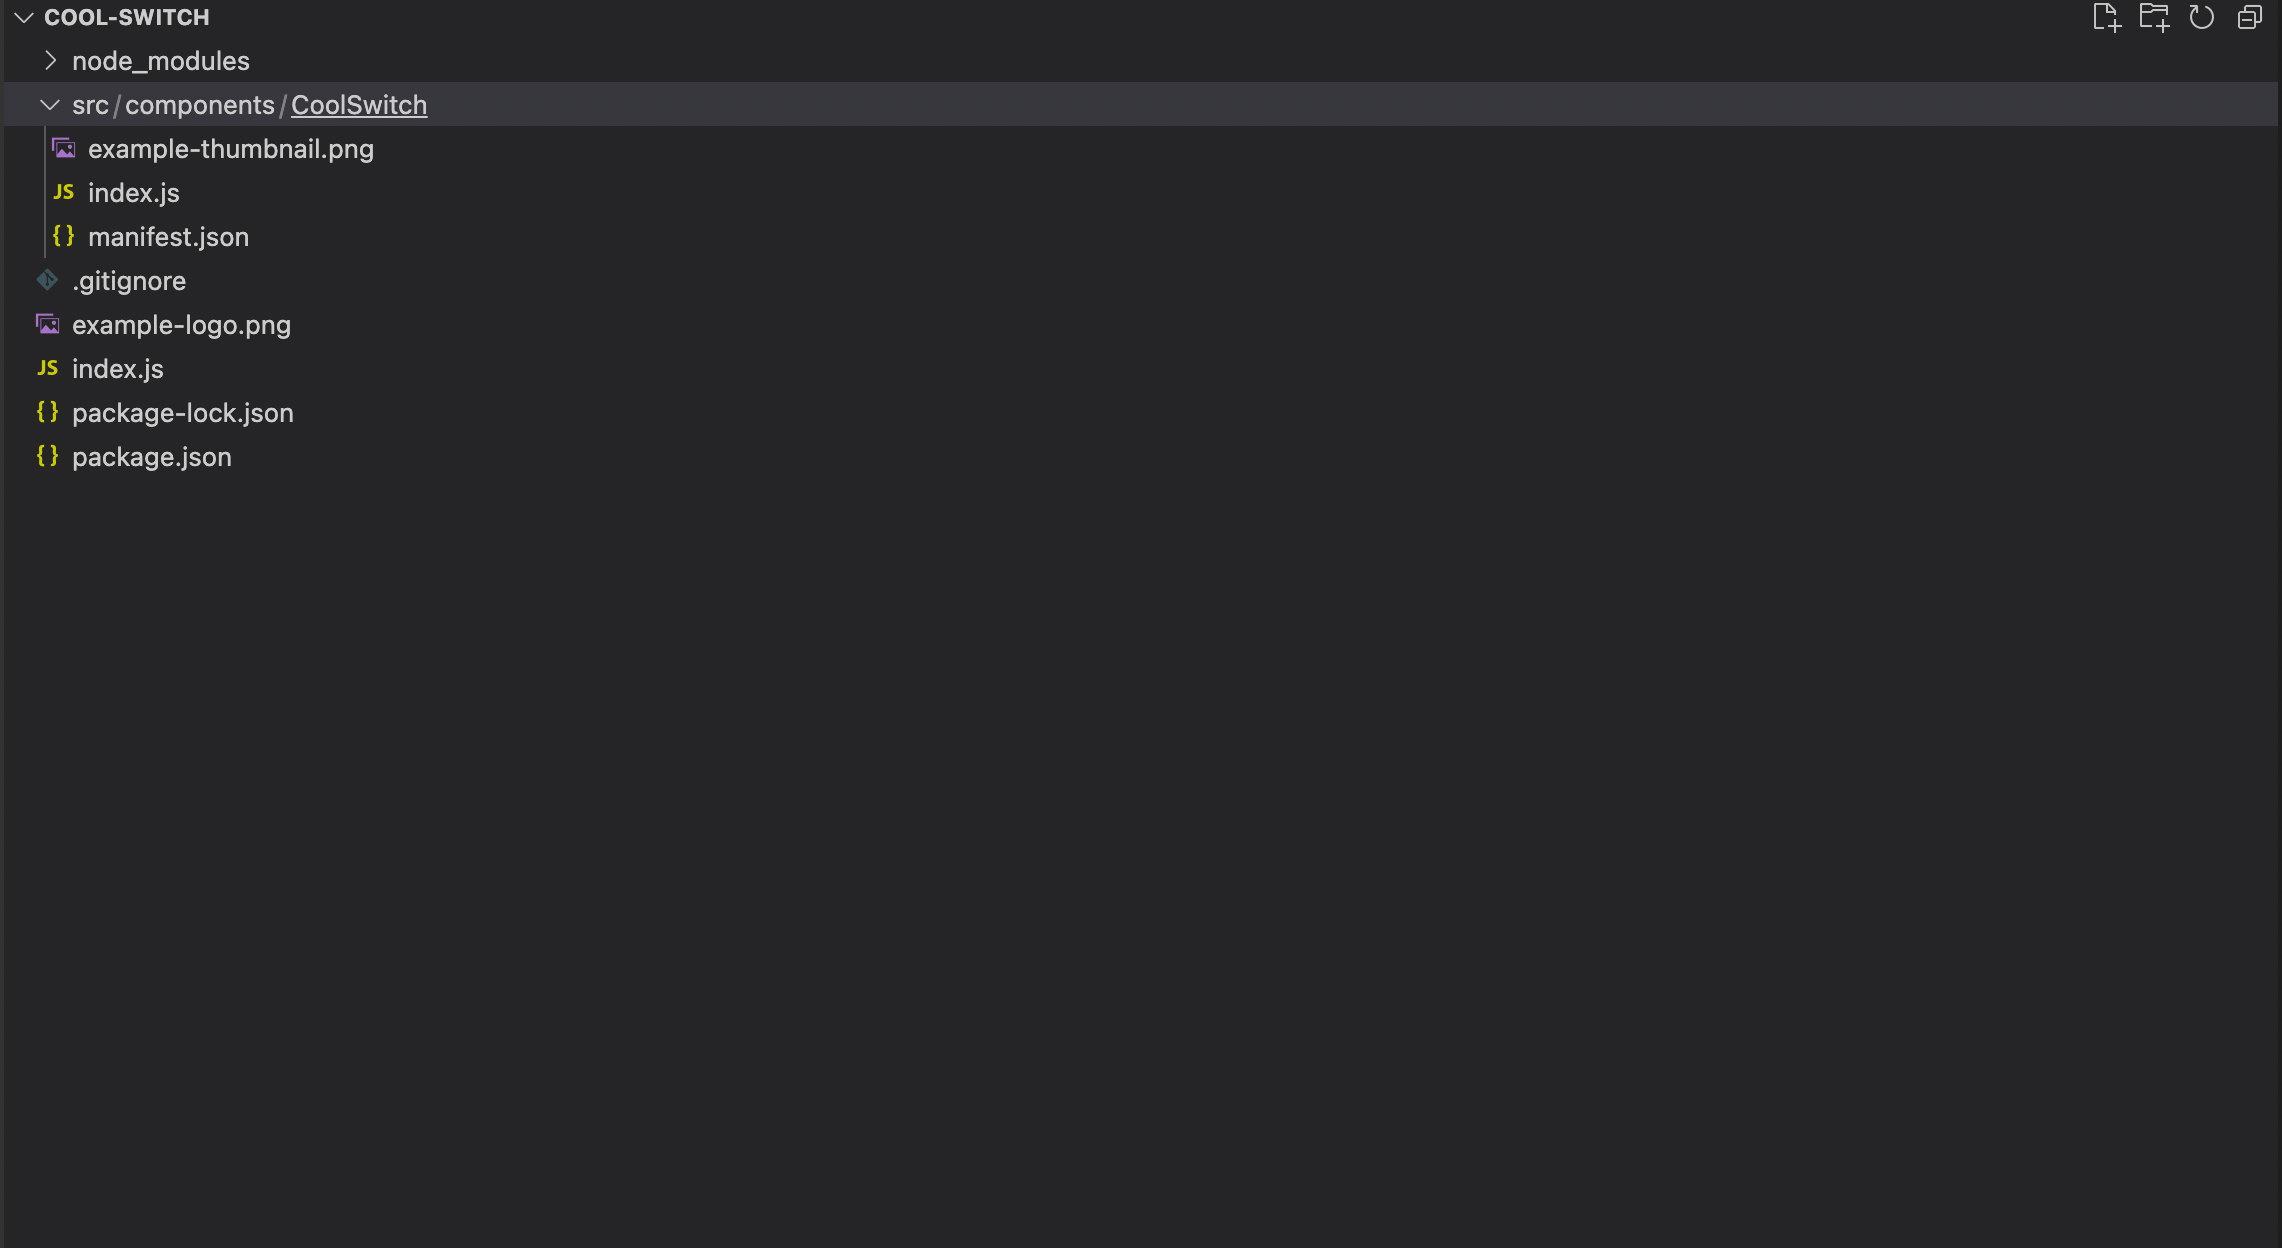
You’ll spend a lot of time in the src manifest.json and index.js
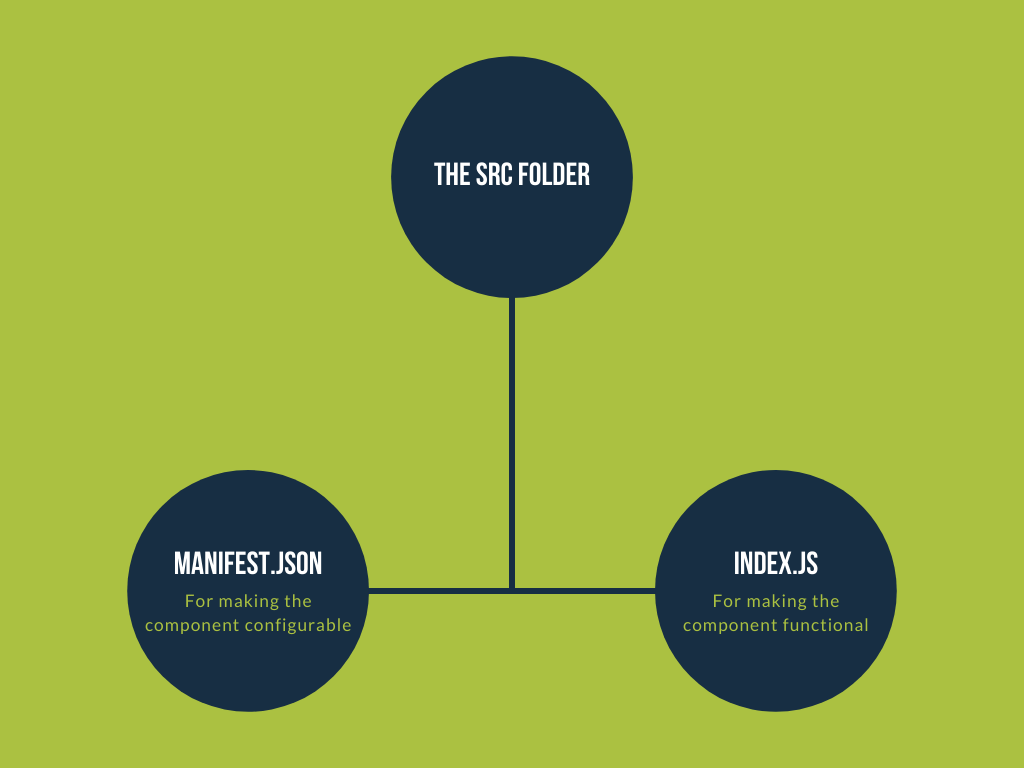
More on that SRC folder
The manifest.json contains all of the configuration properties for your component Adalo's editor. Adalo parses this file and uses it to generate the settings on the left panel in the editor, and each prop inside the manifest is passed down to your component as a React prop.
This is what the manifest looks like in code
{
  "displayName": "Cool Text",
  "defaultWidth": 160,
  "defaultHeight": 24,
  "components": "./index.js",
  "icon": "./example-thumbnail.png",
  "props": [
    {
      "name": "text",
      "displayName": "Text",
      "type": "text",
      "default": "Happy Hacking"
    },
    {
      "name": "color",
      "displayName": "Color",
      "type": "color",
      "default": "#00A898"
    }
  ]
}
And this is what it looks like in your Adalo environmen
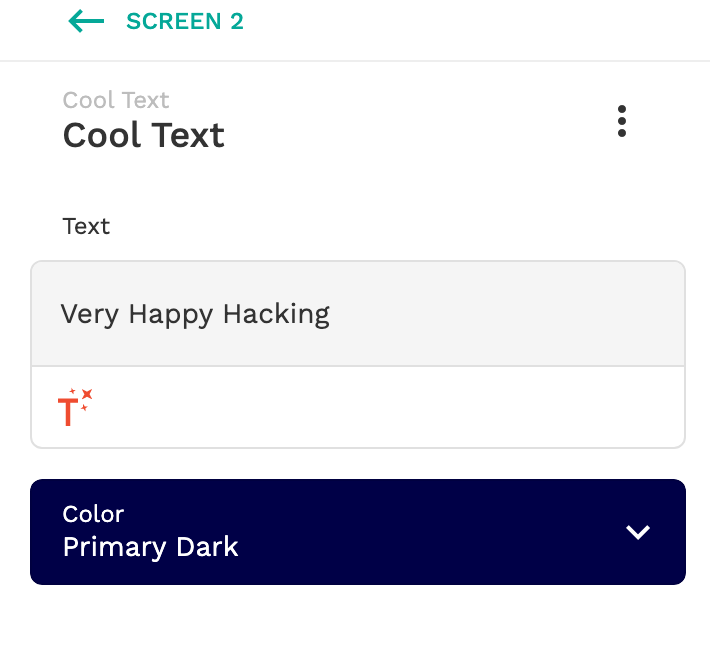
You can learn more about the manifest.json file in Adalo’s developer documentation
The Index.js is where your component becomes functional. Adjusting properties in your manifest should make changes in your index

🚨🚨🚨 An important note when building: Changes to
index.js are automatically reflected in the editor; however, changes to the manifest.json will only show up in the editor after refreshing your Adalo editor and starting the component again. (pressing ^C in the terminal and running yarn adalo dev again) 🚨🚨🚨Adding Elements
(things like buttons, text, etc)
If you want to add buttons to your components, you can create them in the index file directly. Make sure they’re referenced in the return section of the component.
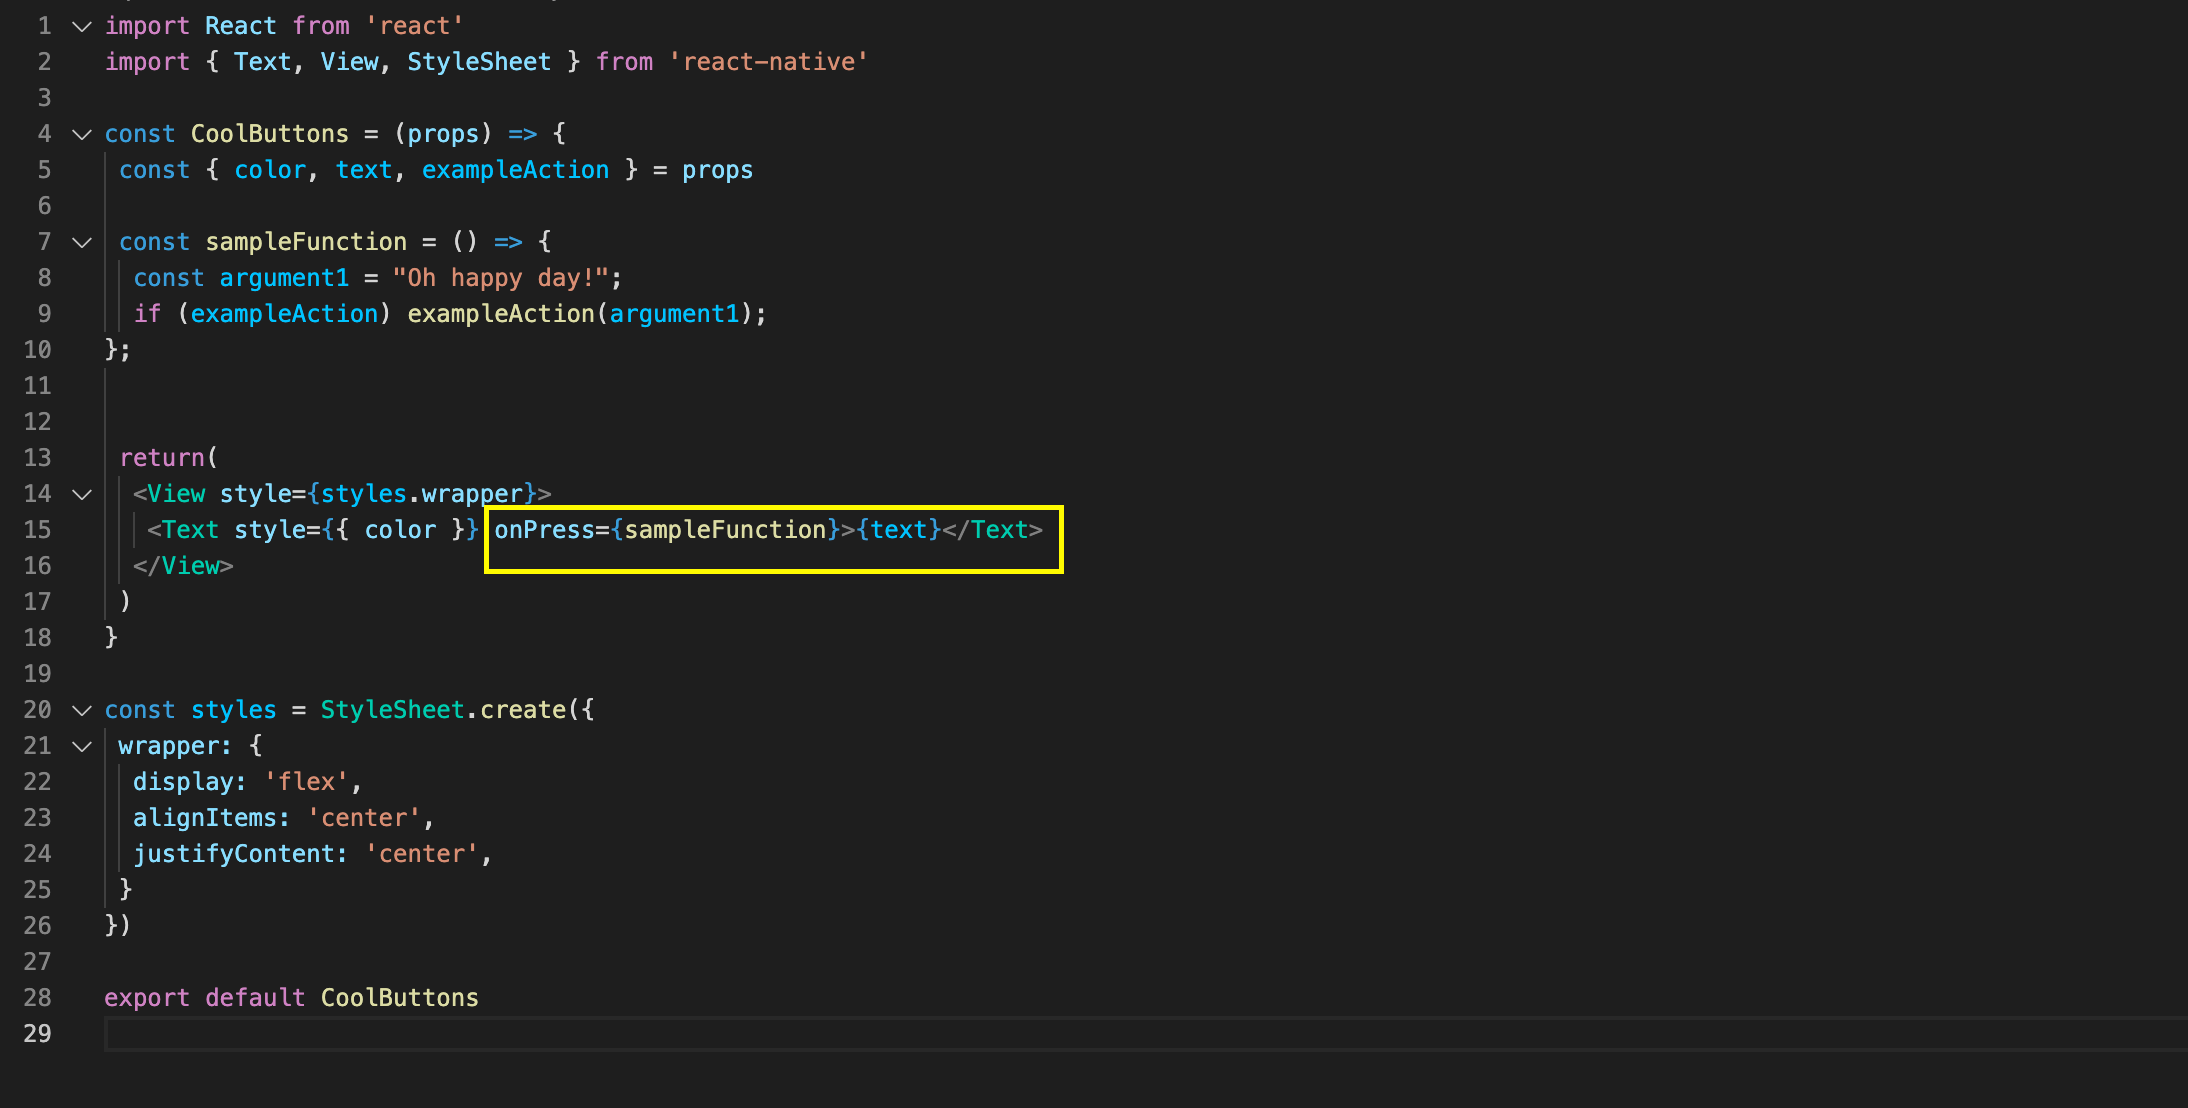
Adding Actions
Adding actions to elements lets users configure subsequent actions in Adalo.
They show up in the properties editor and you can define where they should show up in code.
In this example, I have any defined actions happen after the text is clicked.
They show up in the properties editor
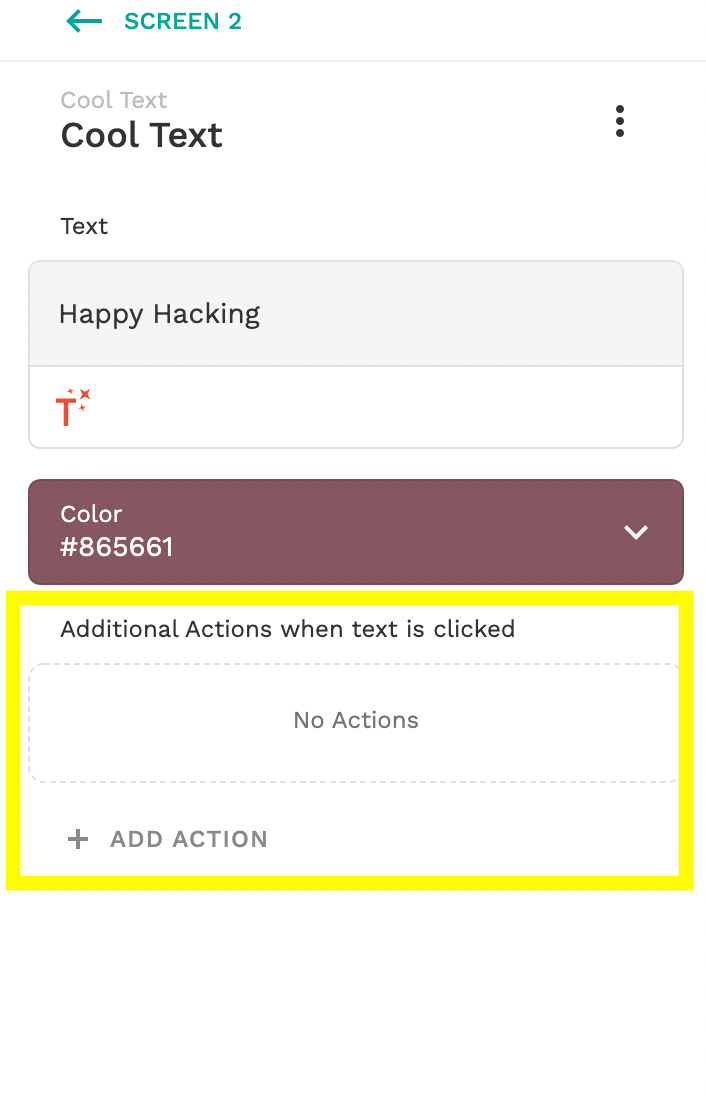
You can define when those actions actions will trigger in code. In this example I have a sample function with the example action and the example action will trigger when the text is clicked.
🚏Routing Data from your component to Adalo
You might want to share data from your component with Adalo so that users of your component can save information to use later. This is especially useful if your component is making an API call to get some data.
To make this happen, you’ll create arguments and then can put them in your functions when you call them, which will let your users utilize information that come from your components.
In my example my exampleAction has a single argument of type text, and in my component’s index.js I supply the argument with “text”
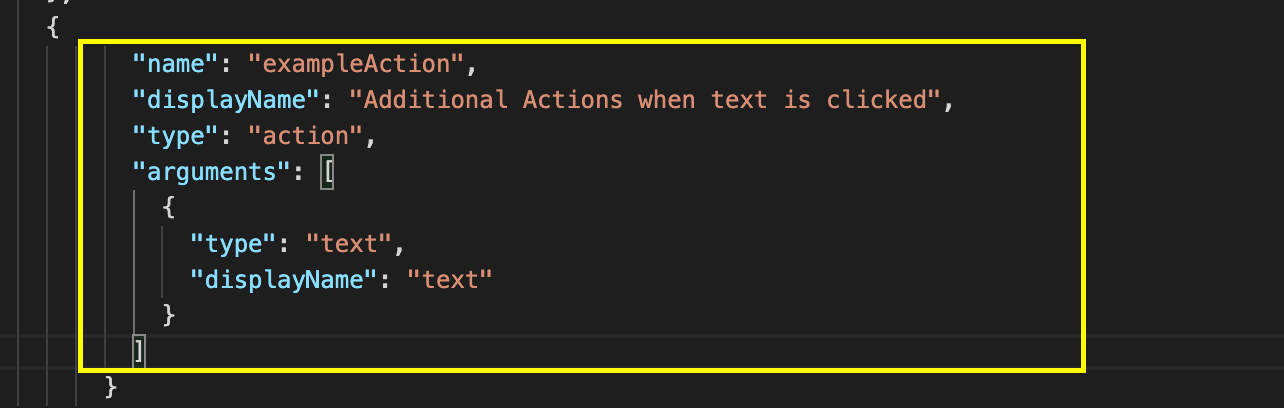
In my properties editor I can now access the data and save it in a data collection or do something else.
A good source on this.
👯♂️ Friendly Reminders, tips and tricks
A collection of friendly reminders, tips and tricks I reference when building components!
Component UX
- You can conditionally show and hide elements
- especially helpful if your component has multiple elements (ie multiple buttons etc)
- rendering something different in the editor (helpful for an element that you’ll only want to render in preview/on the live app example could be a video call)
Adalo’s Standards for publishing components
- Single-purpose. Each component should be designed to solve one specific use case.
- Cross-platform. Each component should be compatible across web, iOS, and Android.
- Highly configurable. Each component should have a large variety of settings, both functionally and stylistically, to enable app creators to have maximum control over the component.
Design — material design
Adalo leverages a material design system so if you’re building components using those design standards will make sure your elements fit into the broader Adalo ecosystem.
Accessing the style prop
You might want to use the style picker when defining props for text. It’s more convenient then having to define each prop individually. This is what it looks like in the manifest
"name": "createText",
          "displayName": "Button text",
          "type": "text",
					"default": "Create room",
          "helpText": "The text that displays on the button",
          "enabled": {
            "editCreateRoomButton": true
          },
          "styles": {
            "fontFamily": "@body",
            "fontWeight": 600,
            "color": "@contrast:createBackgroundColor"
          }
and how you will access it when rendering the element
componenent.styles.prop

// example

createRoomButton.styles.createText
➡️ this is what it looks like in the editor, using the style argument makes it so you don’t have to define a specific prop for each style in your component.

🧠 Commands to remember
Depending on whether you decided to use the package manager when creating the component you’ll put yarn (if you did) in the front of each command or npm (if you didn’t)
# login with your adalo credentials
adalo login# start the development server
adalo dev# publish your component (privately or publicly)
adalo publish🔗 Other Adalo Component Resources
Additional Resources
Curated with ❤️ in Atlanta by Lola of Lunch Pail Labs